The recommended development environment for C++ programming in CPTR 124 and CPTR 318 this semester is Microsoft's Visual Studio Code (VSCode). VSCode is available for free for Microsoft Windows, Apple macOS, and Linux. Many other fine C++ integrated development environments exist for these platforms, but each has its own peculiar way of configuring projects for editing, building, debugging, and executing C++ programs. The process of setting up a C++ project involving external libraries and other dependencies sometimes can become complicated, and it can be tedious to diagnose and correct configuration errors in a multitude of different development systems. Students using VSCode can be assured that they will receive timely support when things are not working as they should.
VSCode is a programming editor coupled with a lightweight project management system. VSCode itself does include the tools necessary for compiling and debugging C++. You must install the C++ development tools (compiler, linker, and debugger) separately and then configure VSCode to use these tools. Fortunately, installing the C++ tools and VSCode and configuring everything to work for our purposes is relatively easy on Windows, macOS, and Linux.
This document explains how to install and configure the necessary C++ development tools and VSCode on Windows, macOS, and Linux.
-
Microsoft Windows
We will use a slightly enhanced version of Stephan T. Lavavej's distribution of the MinGW C++ compiler. Stephan's website has his current MinGW mix, but you should download and unzip MinGW-124.zip. This remix has an additional graphics library (GLUT) and a slightly modified console batch file to integrate better with VSCode. This MinGW package contains all the tools necessary for command-line development with C++ under Windows.
Setting Up VSCode for C++ Development
The following describes the necessary steps to install the VSCode enviroment for C++ development:
- Install the MinGW C++ tools.
- Download the file MinGW-124.zip.
- In a Windows Explorer window, right click on the file and
select "Extract All ..." In the ensuing dialog box be sure
to type C:\ in the text field that specifies the
folder into which the files will be extracted.
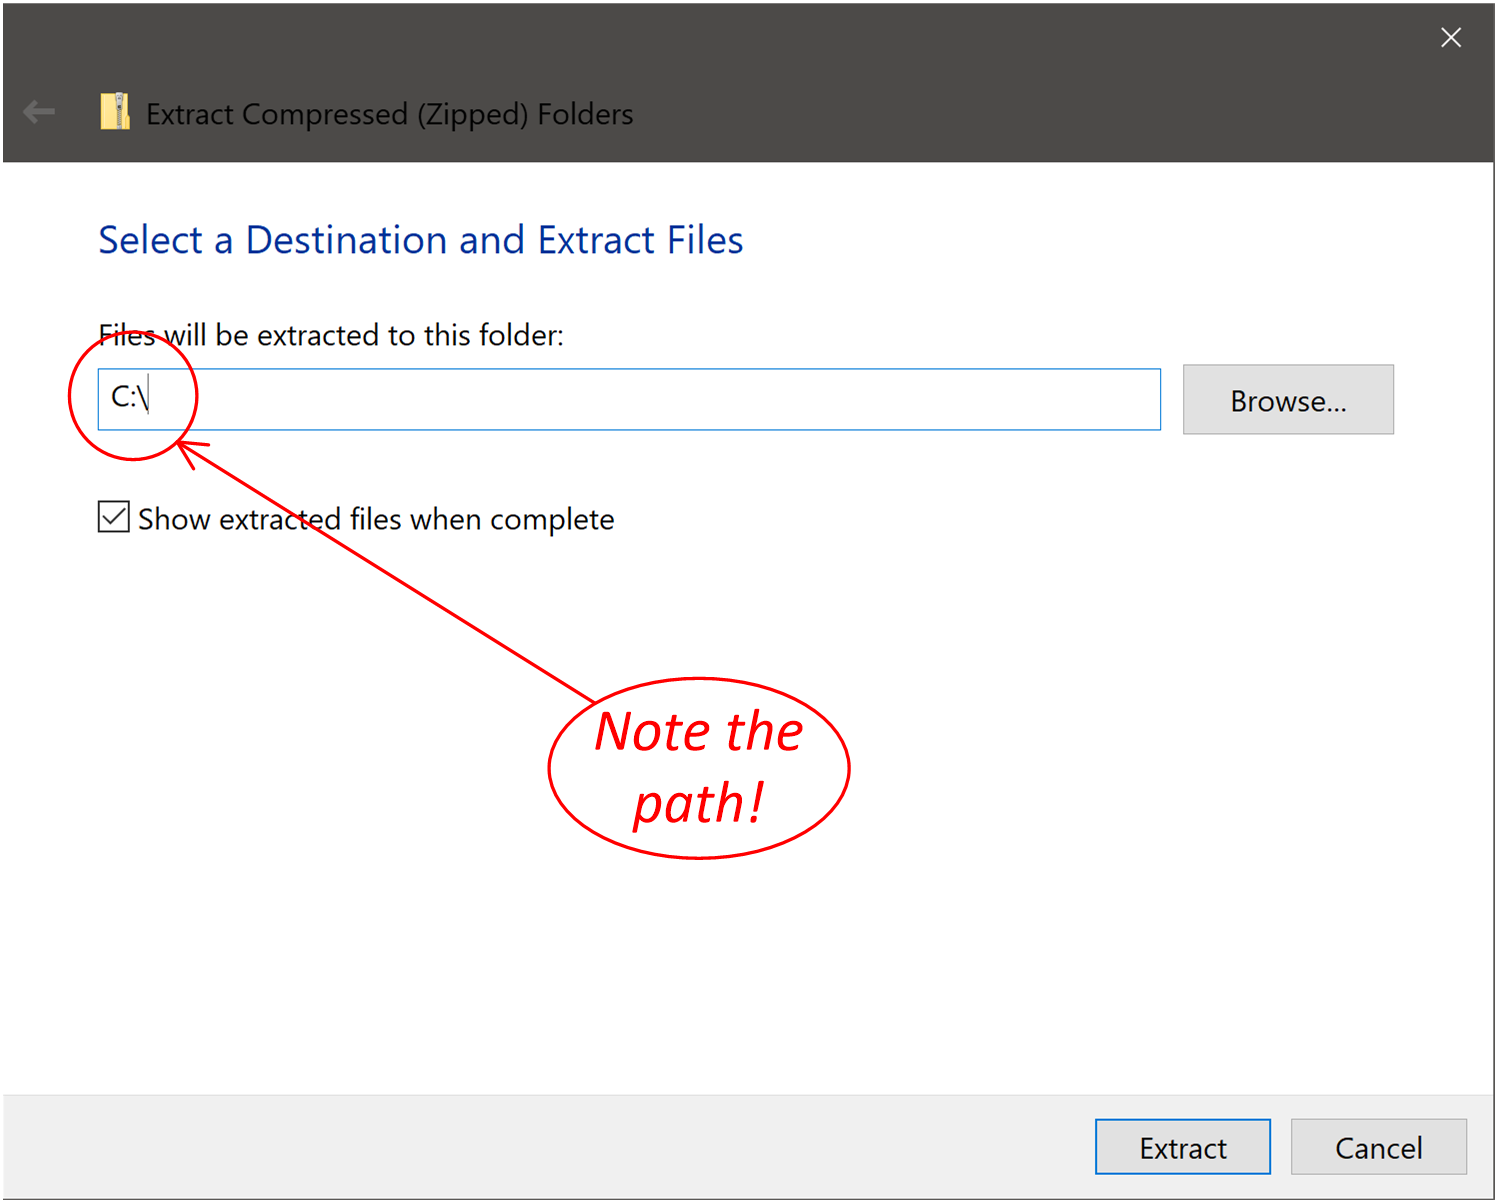
It is important that you use this exact path, or else the VSCode configuration files will not be able to find the C++ toolset.
- Test your MinGW tools installation: In an explorer window, double click on the file
C:\MinGW\vs_code_terminal.bat. You then should see a console window appear. In the console window at theC:\MinGW>prompt type the commandg++ -v:C:\MinGW>g++ -v(The
C:\MinGW>part is prompt provided by the console, and you type only the part that follows.)The console window should respond by printing something similar to the following:
Using built-in specs. COLLECT_GCC=g++ COLLECT_LTO_WRAPPER=c:/mingw/bin/../libexec/gcc/x86_64-w64-mingw32/7.2.0/lto-wrapper.exe Target: x86_64-w64-mingw32 Configured with: ../src/configure --enable-languages=c,c++ --build=x86_64-w64-mingw32 --host=x86_64-w64-mingw32 --target=x86_64-w64-mingw32 --disable-multilib --prefix=/c/temp/gcc/dest --with-sysroot=/c/temp/gcc/dest --disable-libstdcxx-pch --disable-libstdcxx-verbose --disable-nls --disable-shared --disable-win32-registry --with-tune=haswell --enable-threads=posix --enable-libgomp Thread model: posix gcc version 7.2.0 (GCC) C:\MinGW>If instead you see
'g++' is not recognized as an internal or external command, operable program or batch file. C:\MinGW>then something went wrong, and you should ask for help to fix it before continuing with the steps that follow.
This completes the installation of the MinGW C++ toolset.
- Install VSCode.
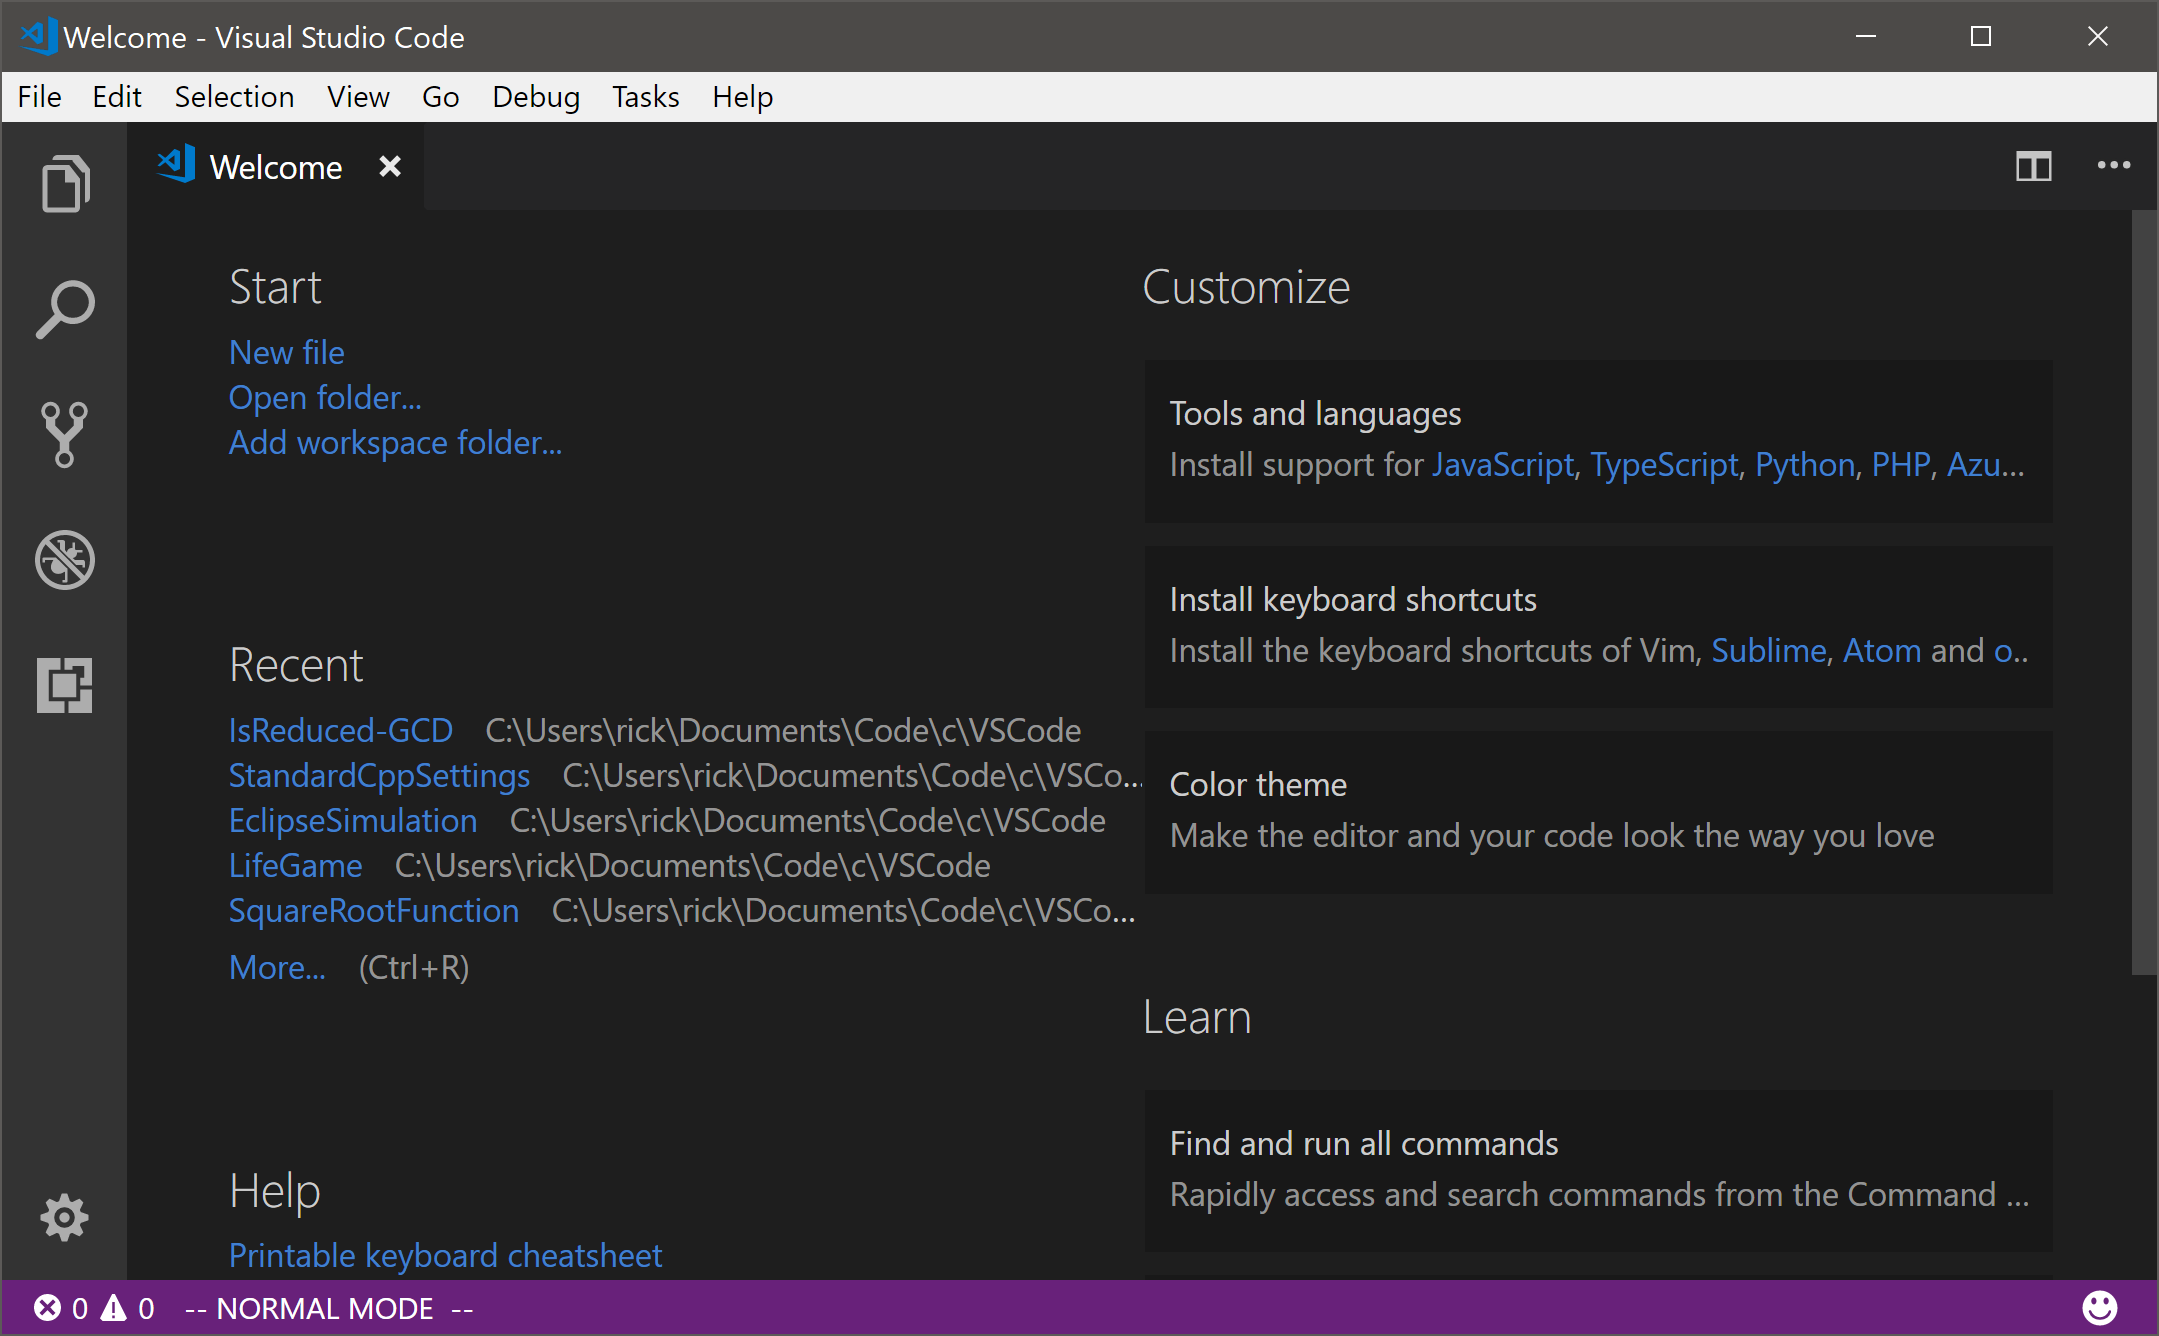
Download the VSCode installer (https://code.visualstudio.com/), and install it as you would any other Windows application. It then should appear in your start menu as "Visual Studio Code." You can pin it to your large start menu or to your taskbar for quicker access. Launch VSCode to ensure that it installed correctly. VSCode should display a welcome screen similar to the one as shown here:
We are not quite ready to start C++ programming, but we almost are there.
This completes the installation of VSCode.
- Work with the sample C++ project.
-
Download the archived sample C++ project,
firstprogram.zip.
Unzip the
firstprogram.zipfile. This creates a folder namedFirstProgram, and in that folder you will find two files and and subfolder:-
starter.cppcontains the source code for a very simple C++ program. -
Makefileis a configuration file that specifies how to build the executable program from the source file. -
.vscodeis a folder that contains several files that allow VSCode to work properly with the MinGW C++ toolset.
The file
starter.cppcontains the following C++ program:#include <iostream> int main() { std::cout << "Our first C++ program\n"; } -
-
Launch VSCode. In the File menu, select "Open Folder ..." and navigate to
the
FirstProgramfolder you just downloaded and unzipped. Direct VSCode to open thisFirstProgramfolder. - From the VSCode Explorer pane on the left you can open the
starter.cppsource file in a editor by double-clicking on it. - You can build and run the program as follows:
- Hold down the
ShiftandCtrlkeys and press theCkey. This brings up a console window. - In the console window type the command
make run. This command will attempt to build the executable program from the source file, and, if it is successful, it will run the program. - The program should print
Our first C++ program
- Hold down the
-
Download the archived sample C++ project,
firstprogram.zip.
Unzip the
In summary, the following three steps set up VSCode for C++ development under Microsoft Windows:
- Unzip the custom MinGW.zip archive into
C:\ - Install VSCode
- Obtain a copy of an existing working C++ VSCode project folder
You need do these three set-up steps only once.
That is all there is to setting up VSCode for C++ development. Next we examine the typical workflow for creating a new C++ project.
Using VSCode
After you have created your first C++ project, creating another one is very simple. To see how simple it is, let's create a new VSCode C++ project and supply our own C++ program.
You will follow steps similar to the following each time you want to write a C++ program using VSCode:
- Copy the folder and its contents of an existing VSCode C++ project.
Since we currently have only one VSCode C++ project
(
FirstProgram), use Window Explorer to make a copy of theFirstProgramfolder. For the sake of this exercise, name itSecondProgram. - Open the copied folder in VSCode.
In this case open the
SecondProgramfolder in VSCode. At this point it is an exact copy of the original project,FirstProgram. - Rename the C++ source file.
Since this is a new program it is a good idea to give the source file
a different name.
Right click on
starter.cppin VSCode's Explorer pane. Select "Rename" to change the file's name tosecondprogram.cpp.(This step technically is not necessary. Since each C++ source file will be in its own project folder, the source files could all have the same name. For example,
program.cppin the project folderProject1could be an entirely different program than in the fileprogram.cppin theProject2project folder.) - Edit the Makefile.
The
Makefileis designed to work with the original project, and we need to make a small change to adapt it to this new project. TheMakefileis expecting a C++ source file namedstarter.cpp, but we just renamed it to besecondprogram.cpp. OpenMakefilein the VSCode editor. Change the first line fromPROGNAME = starter.cpptoPROGNAME = secondprogram.cpp(Note that this step is unnecessary if you did not rename the source file in the previous step.)
- Edit the C++ source file.
We want our new program in this
SecondProgramto behave differently from the one in ourFirstProgramproject. Edit thesecondprogram.cppfile so that it will display the following output when executed:*** This is our second C++ program! *** - Build and run the program.
Bring up a VSCode console window
(press
Shift+Ctrl+C) and typemake run. If the program does not build properly or does run as expected, return to the VSCode editor and make changes to the source code to fix build errors and/or correct the program's errant behavior. It may take many edit-build-run cycles to achieve the finished product that runs correctly.
Summary
In summary, the following three steps set up VSCode for C++ development under Microsoft Windows:
- Unzip the custom MinGW.zip archive into
C:\ - Install VSCode
- Obtain a copy of an existing working C++ VSCode project folder
You need do these three set-up steps only once.
Once set up, the following three steps create a new C++ project in VSCode:
- Copy an existing working C++ VSCode project
- Rename the C++ source file (optional but advisable)
- Edit the first line of the
Makefileto reflect the C++ source file's new name (not necessary if you skipped Step 2) - Edit the C++ source file to implement the desired program
You perform these four steps every time you wish to write a new program using VSCode.
To build and run a C++ program under VSCode, bring up a VSCode console window (press
Shift+Ctrl+C) and typemake run. Repeat the edit-build-run sequence until the program behaves correctly. - Install the MinGW C++ tools.